
Quick answer
For a day hike, choose a route that suits your group, check current access and conditions, and carry navigation, weather protection, lighting, first aid, food, water, and emergency supplies appropriate to the outing. Leave a specific trip plan with a trusted contact. Check the actual equipment before departure. A complete pack helps preparation, but it cannot make an unsuitable route or dangerous weather appropriate.
Product examples to compare
As an Amazon Associate I earn from qualifying purchases. Amazon links below are paid links. Research-based examples; not personally tested.

Black Diamond Spot 400-R Headlamp, Graphite
Rechargeable camp headlamp; up to 400 lumens with Micro-USB charging.
Details & cautions
Black Diamond specifies a 400-lumen maximum output and an integrated 1500 mAh lithium-ion battery with Micro-USB charging. Consider it for hands-free camp tasks when you can keep the rechargeable battery topped up.
Check before buying: This is the rechargeable Spot 400-R, not the AAA-powered Spot 400. Plan a charging source and compatible cable; peak brightness is not sustained for the full runtime.
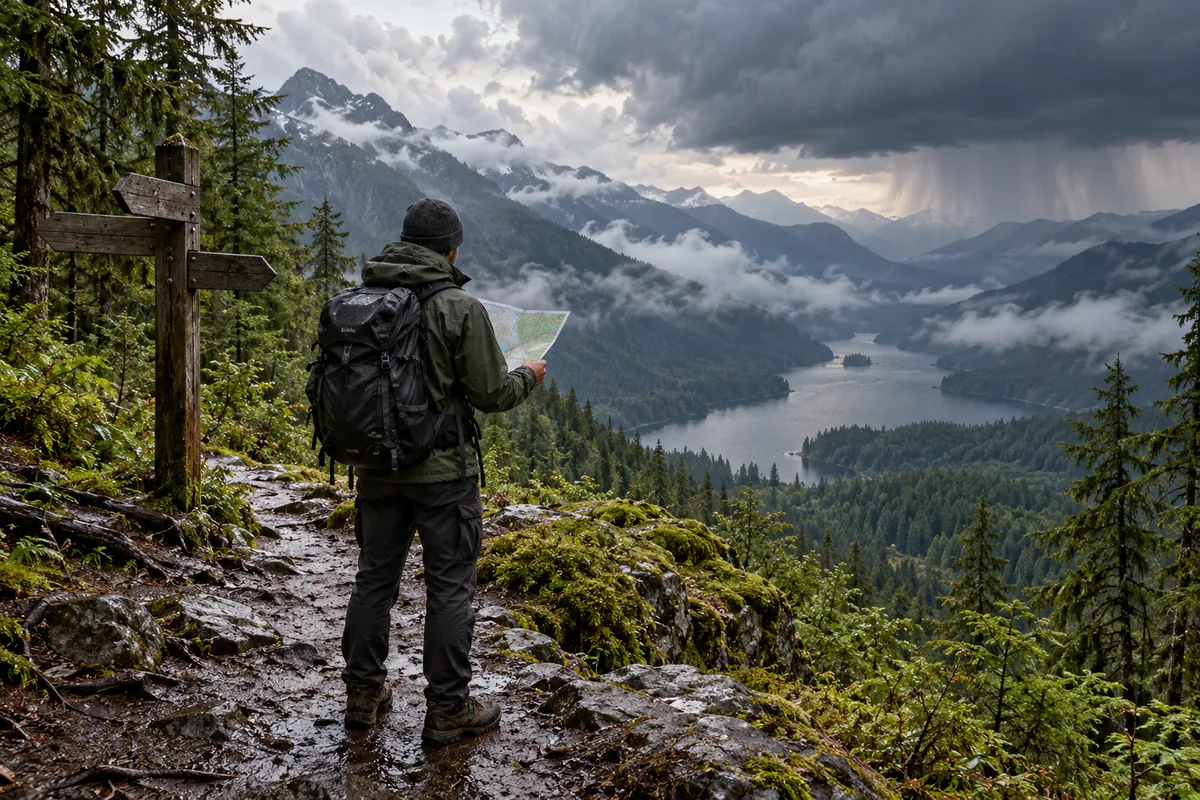
A short walk can be a worthwhile first hike. You do not need an impressive distance to learn whether your pack is comfortable or your route information makes sense. I would start with a manageable trail and a clear plan for returning. Then use this checklist to connect each item you carry to a real need, instead of treating a full backpack as proof that you are ready.
Choose a route for the whole group
Start with the least experienced person’s needs. Consider distance, elevation change, trail surface, exposure, navigation, and how far the route takes you from support. A short distance can still involve difficult terrain.
Use the land manager’s current information rather than relying entirely on an old blog, a social-media photograph, or somebody else’s recorded track. Check access, closures, permits, relevant rules, and local advice. Resolve questions before departure.
Try explaining the route to the person receiving your trip plan. Where do you start, which path will you follow, and where should you finish? Point out junctions where a wrong turn would change the outing. If the explanation becomes vague, take another look at the route information before leaving. That is a question to resolve at home, not halfway along an unfamiliar trail.
Keep another walk or activity in mind. Changing plans because the route no longer suits your group is a sensible outcome, even if you already packed lunch. The checklist should help you make that call, not pressure you to continue. There will be other days for the original route; today’s outing needs to fit today’s conditions and abilities.
The Ten Essentials: categories, not magic objects
The National Park Service Ten Essentials organizes preparation into navigation, sun protection, extra clothing, illumination, first aid, fire, repair tools, nutrition, hydration, and emergency shelter. Treat these as systems whose contents depend on the trip.
- Navigation: route information, suitable tools, and a physical backup you understand.
- Sun protection: appropriate clothing, hat, sunglasses, and sunscreen used as instructed.
- Extra clothing: layers and weather protection for possible conditions.
- Lighting: headlamp or flashlight with the necessary spare power.
- First aid: relevant supplies and personal medicines, plus the knowledge to use them.
- Fire: suitable emergency supplies where appropriate; local restrictions govern use.
- Repair: tools and materials relevant to the equipment carried.
- Nutrition: food for the outing and delays.
- Hydration: drinking water and a source-specific plan where collection is required.
- Emergency shelter: an option suitable for the conditions and outing.
Do not tick “navigation” simply because a phone is present. Do not tick “repair” because there is a tool you cannot operate. Name the actual item, inspect it, and identify any knowledge gap alongside the equipment gap.
A practical day-hike packing list
Gather the following before checking them against the route. The REI day-hiking checklist offers another starting reference, with requirements that vary by duration, conditions, and remoteness.
- A comfortable pack that holds the planned equipment.
- Route map or information, navigation tools, and a usable backup.
- Charged phone, appropriate charging backup, and relevant offline information.
- Weather-appropriate clothing and suitable footwear.
- Additional layers and rain protection where conditions require them.
- Headlamp or flashlight and compatible spare power.
- First-aid supplies, personal medicines, and essential health information.
- Familiar food, drinking water, and a realistic delay allowance.
- Sun and insect protection appropriate to the area.
- Relevant repair supplies and emergency equipment.
- Identification, access information, and a waste bag.
- A trip plan already received by your trusted contact.
This is not a universal quantity list. Water, clothing, food, and equipment depend on the person and conditions. Ask the relevant local source or a qualified guide when you cannot assess what the route requires.
Navigation begins before the trailhead
Examine the route before leaving. Look for the starting point, junctions, landmarks, and places where the intended path changes direction. Check that the map you plan to use actually covers the outing.
If using offline information, download it and verify that it opens in the intended app. Test access without relying on a live connection. A screenshot may preserve useful detail while omitting the surrounding area; understand what your chosen reference includes.
Learn the navigation tools you carry. A compass or GPS device packed as an unfamiliar accessory does not solve a skill gap. Seek appropriate instruction and begin with routes that match your current ability.
Do not assume that a crowd will provide navigation or assistance. Other people may be heading somewhere different, and a busy starting point can lead to a quieter section later. Keep the route decision your own and update it from current official information.
Weather: check the route, not your doorstep
Look at conditions relevant to the actual elevation, location, and expected time outdoors. The weather at home may not represent an exposed trail or a late return. Recheck before departure and at the trailhead when current information is available.
Choose clothing and equipment from that assessment. Pack a weather layer where you can reach it before conditions worsen. Make sure it fits over the clothes you intend to wear rather than discovering a tight fastening on the trail.
Identify which conditions exceed the group’s experience. A beginner outing should not depend on improvising around severe weather, technical snow travel, or other unfamiliar hazards. Change the plan or seek qualified guidance.
Avoid treating a waterproof jacket as permission to ignore a forecast. Equipment protects within its purpose and limitations. Weather decisions also involve route choice, timing, shelter, and the ability to turn back.
Food and water without one-size-fits-all numbers
Choose food you already tolerate and can eat without an elaborate preparation process. Pack it so a short stop does not require emptying the bag. Consider allergies, medical dietary needs, and the outing’s duration.
Plan water around the people, exertion, conditions, and known sources. Avoid borrowing a single bottle count from an unrelated hike. A source shown on a map may be unavailable or unsuitable, so confirm current information where possible.
If treatment is part of the plan, use equipment suited to the actual source and follow its instructions. Clear-looking water is not evidence of safety. Our water filter versus purifier guide explains the selection questions and limitations.
Keep food and water for the walk separate from supplies left in the car. They need to be with you when the vehicle is no longer reachable. The same applies to lighting and first aid.
Pack for use, not just for storage
Place frequently needed items where they can be reached without a complete unpack. A weather layer, water, small snack, and light can be more useful in accessible locations than carefully buried beneath everything else.
Protect dry clothing and essential papers from ordinary moisture. Separate equipment that may become wet or dirty. Follow instructions for electronics and temperature-sensitive items rather than relying on a generic plastic bag as proof of protection.
Try the loaded pack at home. Check fit and whether straps or buckles interfere with movement. Walk around in a safe setting and notice what feels awkward. This is a fit check, not a test proving suitability for every trail.
Keep shared equipment responsibilities clear. If one person carries the first-aid pouch or treatment system, make sure the group knows where it is. Do not split essential components so that they cannot work unless everyone remains beside one another.
Shoes and clothing you already understand
Choose footwear suited to the route and already known to fit. A first hike is an inconvenient place to discover that new shoes cause discomfort. Consider surface and conditions rather than choosing solely by appearance.
Check socks, fastenings, and any personal support requirements. If you have a health or mobility concern, seek appropriate professional advice and select an outing accordingly. A generic gear list cannot assess individual suitability.
Use clothing you can adjust. Keep extra layers accessible and dry. Check that rain protection and gloves can be handled with the other equipment you plan to carry.
Bring what supports the planned conditions without turning every optional garment into a necessity. Packing decisions should be deliberate. Remove duplicates that have no purpose, but do not remove needed protection simply to make the bag look minimalist.
Write a trip plan your contact can use
Give a trusted person the named route, starting point, intended finish, group, expected return, and agreed check-in arrangement. Confirm that they received it. “Going hiking” is too vague to communicate the plan.
Discuss what to do if you do not check in. Use relevant local advice and the actual circumstances rather than relying on a universal waiting period invented by a checklist. Keep the appropriate contact information with the record.
If you change the route or timing before leaving, update the version your contact holds. A revised note on your own phone does not inform anyone else. When changes occur during the trip, communicate them when you can safely do so.
Share identifying details privately. A public website inventory or social-media comment is not the place to store personal trip records. Your contact needs useful information without unnecessary public disclosure.
Turnaround decisions belong in the plan
Agree on a turnaround point or time that accounts for returning, not just reaching the destination. Consider the group’s pace, remaining daylight, current conditions, and the supplies available. Do not use another person’s fastest recorded time as your schedule.
Make it acceptable for anyone to raise a concern. A person may be tired, uncomfortable, or worried about a condition they do not yet know how to describe. Listen before the problem becomes a reason to hurry.
Reaching a viewpoint is optional; getting back requires a plan. If conditions or preparation no longer match the outing, change the activity. A packed checklist does not obligate you to complete the route.
Keep decisions simple enough to use outdoors. You do not need a complex scoring system to recognize a closed trail, unsuitable weather, missing equipment, or a group member who cannot continue comfortably.
A beginner example: a manageable local route
Imagine a short outing on a named local trail with current access information. The group confirms the starting point, studies the junctions, checks conditions, and shares an expected return with a contact. Each person knows the plan before leaving.
The packing check then becomes concrete. The route map opens offline, the light works, water is present, clothing suits the forecast, and any shared equipment has an assigned carrier. Missing components are corrected at home.
At the trailhead, a closure or changed condition would still change the decision. The original plan does not override the information in front of you. Choosing a different suitable activity is part of using the preparation well.
After returning, the group checks in and records what was awkward. That feedback improves the next outing without requiring an immediate shopping trip.
A beginner example: the plan exceeds the preparation
Suppose an attractive route turns out to involve unfamiliar terrain, uncertain water, or conditions outside the group’s experience. The equipment list may be complete, but that does not resolve the underlying suitability problem.
Name the gap specifically. “Need a new jacket” is different from “do not understand the route hazards.” A purchase might address one equipment issue while leaving the skill and route decisions untouched.
Choose a more suitable outing or obtain qualified guidance. Do not assume an online checklist, a social-media video, or another group’s presence makes the original plan appropriate.
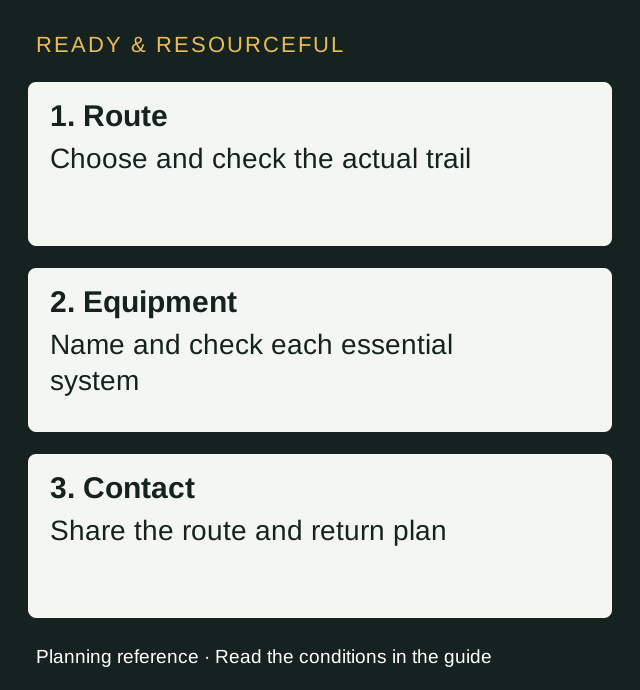
This example is why preparation should have a “need to learn” column alongside “need to pack.” It helps you spend effort on the actual problem instead of collecting equipment that creates false confidence.
At the trailhead: a final decision check
Confirm the start, current notices, group condition, and expected return. Check that the supplies are in the packs leaving the car rather than still in the trunk. Keep access information available.
Make sure everyone understands the route and turnaround arrangement. Identify who carries shared equipment. Resolve an important missing item or change the outing instead of starting while hoping it will not matter.
Use current land-manager information for local restrictions, including fire and waste rules. Having emergency fire supplies does not grant permission to light a fire wherever you stop.
Once underway, keep checking whether the route and group remain consistent with the plan. Preparation is a continuing decision process, not a form completed at the parking area.
Returning home and getting ready again
Check in with the trusted contact as agreed. Do this before the outing fades into the rest of the day. A contact should not need to guess whether you returned safely.
Separate used, wet, damaged, or incomplete equipment from the ready group. Follow manufacturer care instructions and replenish consumables. Keep a light with depleted power from quietly returning to the pack as if nothing changed.
Note practical improvements: a map that was hard to read, a layer packed too deeply, food that was inconvenient, or a missing connector. Make one specific change for each issue.
Our camping gear storage guide helps organize equipment between outings. Save the trip-specific list, but reassess it before another route. Familiar packing does not mean every future hike needs the same supplies.
Common questions
Can a beginner do a short hike without a full plan?
A short planned duration does not remove route, weather, and communication questions. Keep the preparation proportionate, but establish where you are going, what you need, and who knows the plan.
Is a phone enough for navigation?
Do not assume power, reception, or downloaded coverage. Understand the information and tools you intend to use, and carry a suitable backup. Learn navigation skills before relying on equipment in unfamiliar conditions.
What should I buy first?
Identify the actual gap in your chosen outing before shopping. You may need route information, instruction, or a more suitable plan rather than another device. Inspect useful equipment you already own and add only what addresses a real requirement.
Keep a local checklist
Download the plain-text checklist and print or save the relevant official instructions before you need them. Review this guide for the conditions behind each item.